


This kit was super-easy to install, thanks to a detailed walk-through from FastM.com. I should have put these on the car years ago.Pull the sidemarkers and trim from the headlights out. Then remove the clear lenses.

You’re left with a wide-eyed looking headlight.

Clip the angel eyes to the headlight.

Make sure it is hella flush approved.

(Not pictured) pull the wiring through the rubber boot in the back of the headlight housing and wire up accordingly.

Searchlights aren’t this bright.

Both sides wired up.

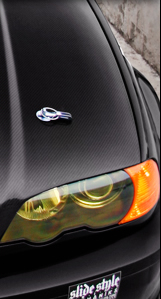
All the lenses and trim buttoned back up and ready to go. My driver-side headlight was shattered where Austin and I collided… so this was a good time to epoxy it back together.

My point-and-shoot does these things ZERO justice. They look awesome, and they are SUPER bright.

6 Comments so far
Leave a comment


Very cool dude i was wondering why it took you so long to get these cranking, would look great at night.
God i love your Andy!!!
You on twitter? Or facebook?
I want install angel eye.
I cant set it.
how to install it. plz help me.
Check out http://www.fastm.com/m3/angeleyes_orionv2.html… he has a VERY detailed walk-through of the install.
:)
I want install angel eye.
I cant set it.
how to install it. plz help me.
What brand are these dude?
They are made by Um•Nitza.